Latest news is that the contractor from hell has serious health issues. So serious he had closed down his construction company and sold his property here in Angel Fire (the one with the addition built with my materials). I hope this means he does not have the money or heart to pursue his frivolous legal action against me. June 30th, this Monday, the lawyers and judge are suppose to have a telephone conference on the calendar for the lawsuit. Maybe on that day his attorney will officially announce they are dropping the action. Wouldn't that be nice.
Anyway this is a blog from March 2008 when I was finally getting my studio painted. Just before this - March 3rd I had heard he was going for judgment.
Significant progress was made today. Not so much in volume of work done but in milestones reached. The painting is done (well, except for trim and touch up) and the cement board (Hardibacker) has begun to be laid in preparation for tile.
When I was so upset and frustrated I was trying to follow the directions I picked up with the store and was using the second and/or third color with just a bit of clear glaze and applied with a sea sponge. It was far busier than I wanted and was going to be so labor intensive it would b years before it was done.
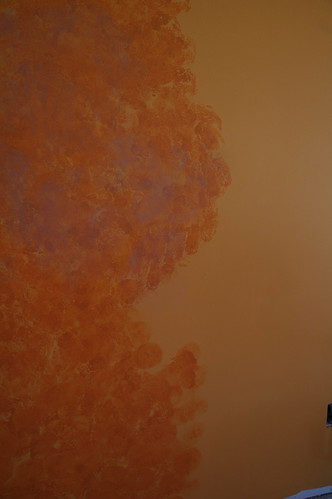
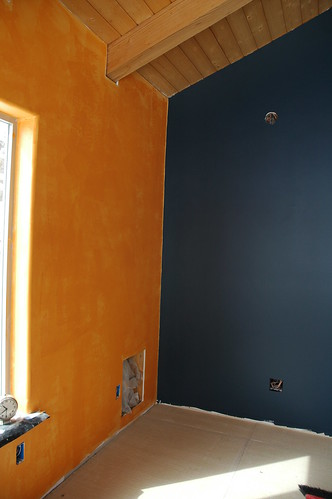
This was so much faster than the sea sponge Karate Kid wax on wax off technique that I was enchanted. It also looks more like an old stucco wall and is not so busy that paintings placed against it get swallowed. This photo also shows the Hardibacker laid down in this section and ready to be screwed into place
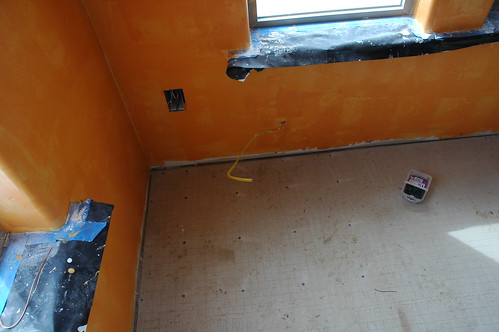
If you follow the manufacturers directions it requires about 70 screws per 3 x 5 foot cement board. When I have done this before I used a masonry bit and pre-drilled the holes. But a contractor turned me on to Buildex's Rock-on screws that don't require pre-drilling. A bit pricier I suppose given how many I will use but how well this underlayment is down makes a difference in the tile laying and it not cracking. It is also part of the "heat sink" part of the studio. It and the tile will hold the heat from the sun through the windows and reduce heating costs in the winter.
The opening photo is of the wood sills. They are what is covered up with the black plastic and blue tape. My thought is to stain these a red-oak like the connecting door. Another piece of 3" trim goes under them and after the tile is laid a 3 to 4 inch trim around the bottom of the walls. I am thinking of the red oak for both of these. But the trim along the ceiling I am going to leave natural wood. Darker colors toward the floor and lighter colors toward the ceiling. Old cathedral trick.
No comments:
Post a Comment